5/21/2012

Chocolate Gravy

I come from a family where gravy is considered a beverage.
- Erma Bombeck

This is no more true than when the gravy happens to be of the chocolate variety.  I want to set your mind at ease right now:  this is not chocolate flavored meat gravy!  This is like pourable, drinkable, soak-inable pudding...only better.  You can make it as chocolatey as you please, and it is just as good served for breakfast as it is served as a midnight snack.  This is not my personal recipe; I do not know where the recipe originated.  It is a southern/mountain thang, and it is so good you'll wonder why you ever bothered with that sausage stuff.  This recipe is taken from the very last page (318) in the Mountain Recipe Collection By Valeria S. Ison.  This is one of my mom's favorite cookbooks, so in '94 or '95 she bought me an autographed copy, "Best wishes Amanda."  Some of our best loved recipes are within these pages, and Chocolate Gravy is no exception.  Try it once, and you will quickly understand the addiction.

The first thing you need to do is head over to Blue Ribbon Buttermilk Biscuits, and make a batch.  While they are baking, you can get the gravy done.  We always do a double (sometimes triple!) batch, because a single batch is barely enough for 2 biscuits to swim in, and you're going to have a dozen or so waiting for their turn in the wading pool.  Following is the recipe as it appears in the cookbook.

Chocolate Gravy


3 level Tbsp. flour
1/2 C. sugar
1 Tbsp. butter
1 Tbsp. cocoa (heaping)
1-1/2 C. liquid or 1 C. milk and 1/2 C. water

Mix flour, cocoa and sugar.  Add milk and cook until thick.  Stir in butter.

NOTE: Mam (grandmother) always served chocolate gravy for breakfast when we were there.

Double Batch

6 level Tb flour
1 cup sugar
2 Tb butter
2-3 Tb unsweetened cocoa powder (heaping - definitely!)
3 cups milk

1. Mix dry ingredients together in a large, heavy-bottomed saucepan.  Using a whisk or fork, incorporate all the dry ingredients and try to work out most of the lumps of flour. 


2. Add the milk, and stir until the dry ingredients are mixed in.  The gravy will be very thin and foamy at this point. *It works best to stir in about 1/3-1/2c milk at a time and incorporate that.  It produces a gravy with less lumps at the beginning, which means less time spent trying to smoosh lumps out as you stir.*


3. Turn on the stove cap, and heat on medium-high until the gravy has thickened to the desired consistency.  This will take some time.  The first thing you will notice is the foam from the whisking of the milk disappears.  If you see flour lumps at this point, do not be alarmed.  They will most likely all dissolve by the time the gravy is thickened.  If there are a few stubborn lumps, just smoosh them up against the side of the pan, and then stir them in.


If you are familiar with the density of gravy as it is being stirred, you will recognize when the gravy is getting close to done just by the way your spoon feels as you stir.  If, however, you are a newbie to making gravy or thickened sauces, you might want to periodically scoop a spoonful and pour it back into the pan to see if it is thickened enough to be gravy or if it is still chocolate milk.

4. Once the gravy has thickened to the consistency you prefer, immediately remove it from the heat and add the butter.  Stir the gravy until all the butter has melted and disappeared.  Serve it immediately over freshly baked Blue Ribbon Buttermilk Biscuits...or drink it as Ms. Bombeck suggests!


I apologize for the absence of a picture of a biscuit smothered in chocolate gravy.  I was so hungry and anxious to eat that I forgot to document the finished product.  I will try to remember to snap a picture soon and get it up here for all you soon-to-be chocolate gravy lovers.

This oversight was corrected on Dec 12, 2013 :)


Blue Ribbon Buttermilk Biscuits

"Deliberation, n.: The act of examining one's bread to determine which side it is buttered on."
- Ambrose Bierce

When I was growing up, there were two things we had for breakfast:  buttermilk biscuits, and buttermilk pancakes.  Both were homemade by my mom, very filling, slathered with butter, and in the case of the biscuits, topped with homemade jelly (more on that later).  I attempted to learn to make biscuits as an early teen, but I just couldn't get the hang of it, got frustrated, and never really picked it up again until college.  I wrote my first paper for my EDU 103 class in the summer of 2003 on teaching my husband (then boyfriend) to properly "pat out" biscuits.  I still didn't have the finesse making blue-ribbon winning buttermilk biscuits until I spent 5 months caring for my dying grandfather.  It was then that I perfected a batch of a half-dozen biscuits, golden brown, steaming hot, and made with all the love I could muster.  To set the record straight, I do not measure my ingredients.  I make my biscuits in a Texas Ware bowl, just like my mom.  I eyeball it.  I understand that a lot of people simply cannot bake or cook that way, so I will also provide the recipe from the White Lily cook book I referenced in the Busy Day Microwave Mug Cake recipe.  I call these Blue Ribbon biscuits, because my mom actually won a blue ribbon (more than once) for a plate of these delicacies at our local county fair.

Buttermilk Biscuits


6 heaping 1/4 cup measures White Lily Self-Rising Flour
3-4 fork scrapes shortening (i.e., Crisco)
enough buttermilk


To make buttermilk alternative

If you do not keep buttermilk on hand (I don't), put 2 TB lemon juice or white vinegar in 2 cup glass measuring cup. 


Add enough whole milk to equal 2 cups, stir, let sit til milk coats a spoon. 


If your lemon juice or vinegar is not super fresh, you may need to add more, 1 tsp at a time, stirring between additions, until milk has thickened.  You may also use regular milk, but your dough will be stickier, and the biscuits will not taste the same (i.e., not as good).


Preheat oven to 450 degrees Fahrenheit.


Gather your ingredients and the following utensils: bowl, pastry blender, fork, biscuit cutter, baking stone/sheet


1. Measure flour into ~10 cup mixing bowl.


2. Add shortening.


3. Using a pastry blender (or fork, or knife), "cut in" shortening into the flour until it has a slightly pebbly texture.

PLEASE MUTE THIS BEFORE PLAYING THIS. MY SMOKE ALARM WAS GOING OFF DUE TO THE HEAT FROM MY OVEN.
4. Using a fork, scrape down the blender, make a well in the middle of the bowl.


5. Pour enough buttermilk into the well to fill it almost to the top of the edge of the well.


6. Using the fork, stir slowly in the center of the milk to begin pulling in the flour/shortening.  Continue stirring slowly until all the flour has been incorporated into the milk.  The dough will be sticky.


7. Lightly flour your countertop or table and scrape all the dough onto the flour.  Lightly flour the top of the dough and make a shallow pile of flour to the side of the dough to dip your cutter into.  I used a silicone pastry mat to cut my biscuits on because I didn't want to scar my table.


8. My mom does not "knead" her dough so much as gather it together and flatten it.  I knead mine gently just to make it smoother.  Also, certain TV chefs tell you not to re-knead the dough in order to use the scraps.  I'm sorry, but where I come from, we don't waste "scrap" dough.  We carefully reshape it, cut it, and repeat.  The thing is, you don't want to touch the dough so much that the shortening starts to melt.  If it melts, you will not have a flaky biscuit.  Also, if you work the dough too much either in your initial knead or your repeat shaping, you will make the dough and resulting biscuits tough.  Another thing to remember - gently rest the cutter on the dough and then press straight down.  Do not twist the cutter!  Then pick it straight up.  Watch the video below to see how to "pat out" the dough and cut the biscuits.


9. Place biscuits evenly around ungreased baking stone (or cookie sheet), taking care not to let the sides touch.  I got 11 out of this batch (the little one is what my mamaw would call the "shoemakers last" because you can't pat it out and cut it again).  I typically make more (12-18) with a larger batch, or I make a half dozen.  However, I usually do not bake at home, I bake for the whole family (parents, brother, husband, kids, etc.) at my parents' house.  My mom has a scoop that I know 3 of gives me 6 biscuits.


10. Place stone on the center rack in a preheated oven, and time for 10 minutes.  Biscuits will be done when they are golden brown on top, and the sides are no longer soft or sticky.


11. In the meantime, save the leftover "buttermilk" you made for Buttermilk Pancakes or Cornbread.  Just make sure you put it in a container with a tightly fitting lid to avoid spills.


12. Remove biscuits from the oven carefully, they will be HOT!  Break one open to check the center for doneness.  If they are not completely done in the middle (doughy), return to the oven for 2 more minutes before checking again.


13. Butter for jelly (or homemade apple butter in this case), or head over to check out the recipe for Chocolate Gravy.


If you can't stand the thought of eyeballing it, here is the recipe I promised from the Great Baking cook book.

Famous White Lily Biscuits (actual recipe)

2 cups White Lily Self-Rising Flour
1/4 cup shortening
2/3 to 3/4 cup milk

Preheat oven to 500 degrees.  Place flour in mixing bowl; add shortening.  With pastry blender or blending fork, cut shortening into flour till mixture resembles coarse crumbs.  Mixing by hand tends to soften the shortening, making a sticky, difficult-to-handle dough.  Blending the fat completely with the flour or using a liquid shortening produces a mealy biscuit rather than a flaky, tender one.  Gently push the flour mixture to the edges of the bowl, making a well in the center.  Blend in milk with a fork till dough leaves sides of bowl.  Too much milk makes dough too sticky to handle; not enough milk makes biscuits dry.  Do not overmix.

Turn dough onto lightly floured surface.  Knead gently 10 to 12 strokes.  A short period of kneading develops biscuit structure and evenly distributes the moisture to make the biscuits more flaky.  On lightly floured surface pat or roll dough to slightly more than 1/2-inch thickness.  Cut with a 2- or 2 1/2-inch biscuit cutter, dipping cutter into flour between cuts.  Press cutter straight down to get straight sided, evenly shaped biscuits.  Be especially careful not to twist the cutter or flatten the cut edges.  Transfer cut biscuits to an ungreased baking sheet.  For crusty-sided biscuits place about 1 inch apart.  For soft-sided biscuits, place biscuits with sides just touching.  Reroll scraps of dough and cut into biscuit shapes.  Bake in 500 degree oven for 6 to 8 minutes, or till golden.  (If sides touch, bake biscuits 8 minutes; bake 6 to 7 minutes if sides don't touch.)  Makes eight 2 1/2-inch biscuits or twelve 2-inch biscuits.

5/08/2012

Bertie's Loaded Brownies

"Don't wreck a sublime chocolate experience by feeling guilty." 
- Lora Brody

My mamaw visited her older sister in an assisted living facility and came home raving about the loaded brownies they served.  She went so far as to say, "If I had known Add wasn't going to eat more than a bite of hers, I would have eaten it too!"  That means it was really tasty, since my mamaw eats very little of anything!  She asked me if I could find a recipe for such a thing, and I said if I couldn't I would create one of my own.  So here it is, a compromise between an existing recipe from Betty Crocker's red plaid cookbook (c. 1975) and my own imaginings.  Why reinvent the wheel if you don't have to?

Bertie's Loaded Brownies


I took a picture of the cookbook after I wrote in my modifications.  The first modification I made was to use a larger pan, which means the brownie is much thinner and cooks faster.  If you use the pan size indicated in the original recipe, you will need to use the original cook times as well.  I also omitted the nuts from the cream cheese filling, since there are nuts on top.

Original Recipe with my modifications

Brownies:

1 cup semi-sweet chocolate chips
6 Tb butter or margarine
1/3 cup honey
2 eggs, beaten
1 tsp vanilla
1/2 cup sifted all-purpose flour (sift then measure)
1/2 tsp baking powder

Filling:

 8 oz cream cheese, softened
1/2 cup sugar
1 egg
salt


1. Preheat oven to 350 degrees F. Line a 9x13x2-inch pan with foil, and spray the bottom only with cooking spray. (An easy way to form the foil to the pan is to turn it upside down, lay the shiny side of the foil on the pan, press it around the edges, turn the pan over, insert foil, and crimp edges to pan)
2. Melt chocolate and butter over low heat; stir constantly.  Make sure to heat until it is smooth!  You don't want any solid pieces of chocolate in the brownie batter.  Set it aside to cool while you do the next few steps.

Chocolate chips, butter (cut into "pats")

Chocolate/butter, melted and stirred til smooth
3. Gradually add honey to beaten eggs in a medium bowl.

Beaten eggs, honey added
4. While chocolate continues to cool, cream together cream cheese and sugar.  Once it is smooth, beat in the egg and salt.  (If you want the nuts in the filling instead of on top, add 1/2 cup chopped nuts now)

Cream cheese filling
5. Check chocolate to be sure it is cooled.  If it is not cool before you add it to the eggs/honey, your eggs will start to cook.  Blend chocolate mixture and vanilla into eggs/honey.

Chocolate & egg mixtures
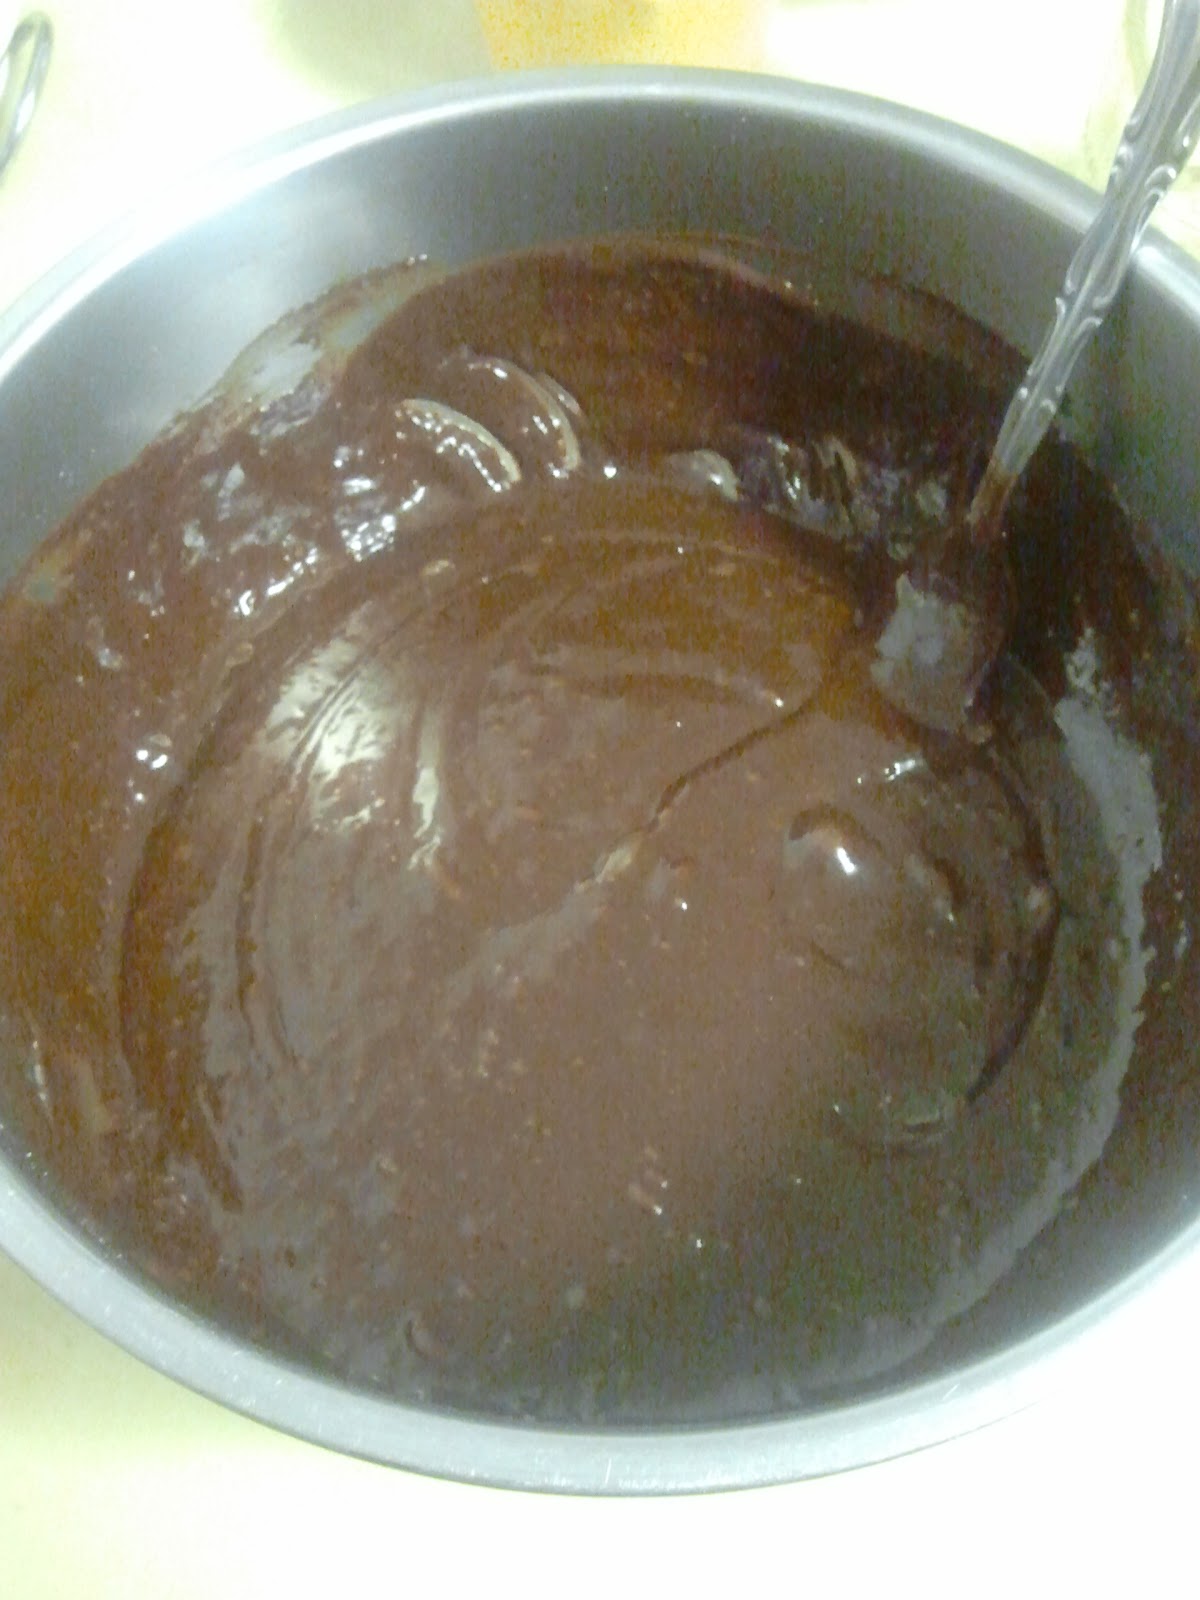
6. Sift together flour and baking powder (yes, you are sifting the flour twice).  Add it to chocolate mixture; stir just until the flour disappears.


Sifted flour, baking powder - sift together

Dry ingredients added to wet

Mixed just til the flour disappeared - if you overmix, the brownie will have the wrong texture
7. Pour half the batter into the pan.  Since you are using a large pan, you will have to be careful not to put too much in at first.  I had about 1/8" depth in my pan, and I had to be careful to make sure the batter was even and covered the bottom of the pan.
8. Bake in preheated oven for 7 minutes.
Bottom "crust" layer, baked
9. Pour filling over partially baked brownie "crust" and spread it carefully so you don't tear up the bottom brownie.
10. Drizzle or spoon the remaining half of batter over the cream cheese filling, and very carefully spread it as best as you can.  You want to have 3 distinct layers rather than a bottom layer and a marbled layer like this recipe calls for.

Cream cheese filling spread out, batter drizzled on top

Batter carefully spread to avoid marbling

11. Return to oven to bake for 20 minutes.  Remove from oven, check for doneness using a wooden toothpick inserted into the center of the brownies.  Cool on an elevated cooling rack, or your extra oven rack propped up on 4 soup cans (this is what I do), until the bottom of the pan is cool to the touch.

Fully baked after 20 minutes.  The cream cheese filling will not be this brown - my lighting was off.
Now, it's time to load up your brownies!

Toppings:

1 cup walnut pieces
1 jar Smucker's Caramel Ice Cream Topping
1 jar Maraschino cherries
1 oz unsweetened baking chocolate
1/4 cup miniature chocolate chips
Cherry glaze (recipe follows step 6)

1. Toast walnuts in a pan over medium-low heat, just until the nuts start to take on a golden color.  You don't want them burnt.  I really don't know how long it took, but I would estimate between 5-10 minutes.  My nuts had been in the freezer, so it might take less time for room temp nuts.  Make sure that you stir the nuts frequently to keep them from burning.

Getting ready to toast

Toasted walnuts
2. Chop the nuts into smallish pieces.  Don't pulverize them (I usually do), because you want to be able to feel it in your mouth, chew it, and have the distinct walnut flavor.
Chopped, not pulverized, nuts
3. Sprinkle nuts evenly on top of cooled brownies.
Nuts sprinkled on brownies
4. Drain (into a measuring glass, reserve liquid), remove stems, and roughly chop the cherries into quarters.  Do not individually slice them into four pieces, but they should be about that size.

Chopped cherries
5. Sprinkle cherries evenly on top of nuts.  Pour the caramel sauce slowly on top of the cherries and nuts.  You don't want to glop it all in one place and then spread it out, because that will move the cherries and nuts.  Instead, drizzle/pour it evenly across the top of the nuts and cherries.

Caramel on top
6. Using a knife, either roughly chop or shave the unsweetened chocolate.  It doesn't have to be curls, but flakes or small pieces will be good.  Sprinkle it on top of the caramel, then sprinkle the mini chips on top as well.

The small shavings are the unsweetened baking chocolate
If you want to make a glaze from the cherry juice, now is the time to do it!  The recipe I modified used cornstarch, which I was not a fan of.  It has a chalky taste when I tasted it by itself.  I have made plain syrup before, so what I am going to recommend is using the cherry juice in place of part of the water in a recipe for making syrup.  The jar of cherries I used had a little more than 1/2 cup, but a little less than 2/3 cup of juice in it.

Glaze:

1/2 cup cherry juice
1 cup sugar

1. Stir the sugar into the juice to dissolve it. 
2. Bring the mixture to a gentle boil, and cook without stirring for 3 minutes. 
3. Then boil for 5 to 10 minutes more, stirring often, until the syrup has thickened and will form itself into a thread about 2 inches long when poured from a spoon back into the pot. 
4. Set the syrup aside to cool.

You can use a candy thermometer for this, but I don't recommend it.  Just test the syrup periodically to see if you are nearing thread.  You will see a thread (and you will be super excited) when the last bit of syrup forms a drip on the tip of the spoon, drips off, and a thread (looks like spider's web) is hanging from the spoon.  As I mentioned above, I did not use this recipe, but I used the same basic principle.
Last drip on the spoon

What is left of the thread I got to form. My phone wasn't fast enough to catch it.
Once you cool the syrup, it will pour like any other syrup.  As it cools, stir it every so often to keep a "skin" from forming on top.  Drizzle it across the top, but do not pour it all.  You don't want the caramel and cherry syrups to compete with each other, you want them to complement each other.
Cooled syrup will pour in a stream like any store-bought syrup

Closeup after cherry syrup.  I didn't put much on it, so you can't really see the redness.

I cut them into 1 1/2 x 1 1/2" squares per serving.  Notice the layers in the brownie.
A word of caution:  These brownies are incredibly rich and very sweet.  You will want to cut them into small squares - 2x2" should be more than large enough - because otherwise you might end up with a belly ache!