- E.W. Howe
This pie was created to satisfy a craving...apparently it was for peanut butter! I had been wanting peanut butter cookies, and since my daughter likes to do the rolling-in-sugar and then pressing-with-a-fork parts, I thought it would be a good baking activity to do together. Then, I decided that I wanted peanut butter pie instead. How could I choose between the two?! Decision of impossible proportions, so I did what any other baker would do when faced with an insurmountable choice: I combined them. I had seen a peanut butter pie with chocolate fudge crust when I vacationed in Florida and ate at Sea Hag, but I didn't want a chocolate crust. I did want to incorporate chocolate somehow, so originally I thought about chocolate chips on top. Then, I settled for a ribbon of fudge on top of the crust but under the pie filling...and chocolate chips on top. Thus was born Peanut Butter Overload! I hope you've got your sweet tooth ready for this one!
Peanut Butter Overload Pie
Crust: Peanut Butter Cookies
Better Homes and Gardens New Cook Book (© 1976)
1/2 cup butter (or margarine)1/2 cup peanut butter (creamy)
1/2 cup granulated sugar
1/2 cup brown sugar
1 egg
1/2 tsp vanilla1 1/4 cups sifted all-purpose flour
3/4 tsp soda (baking)
1/4 tsp salt

2. Sift together dry ingredients; blend into creamed mixture.


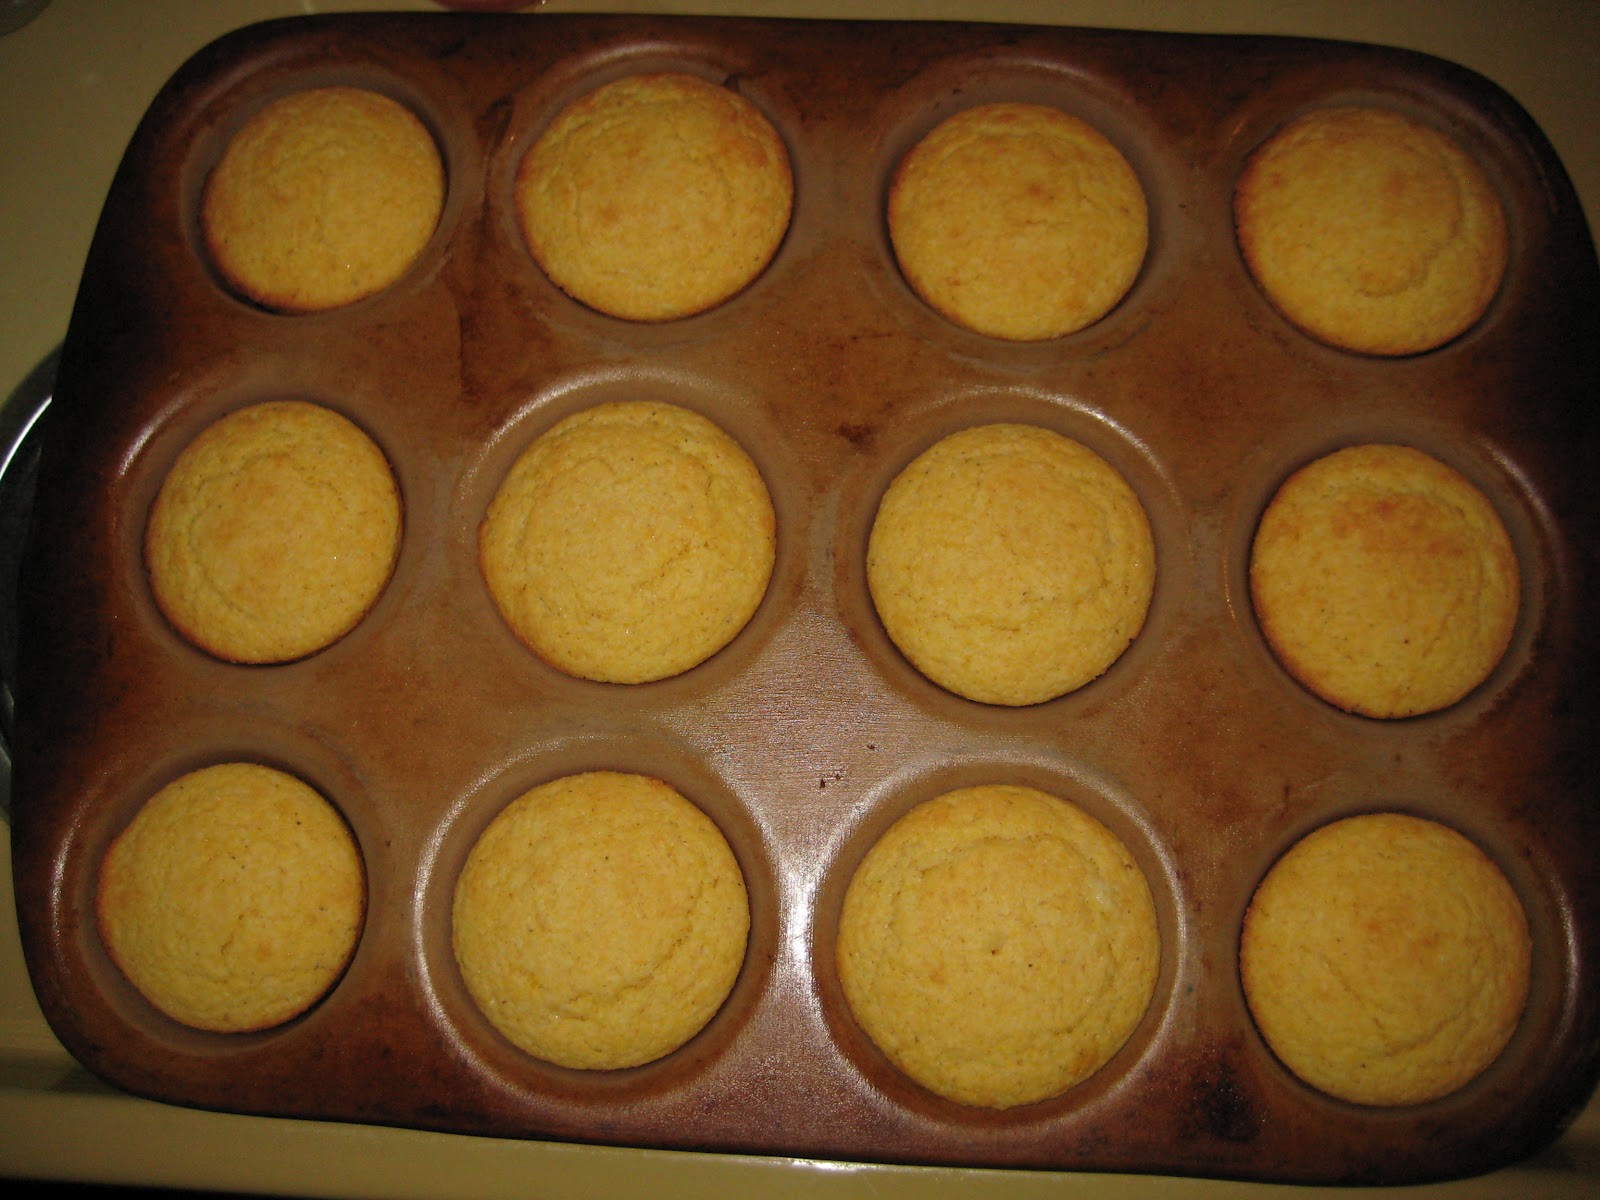
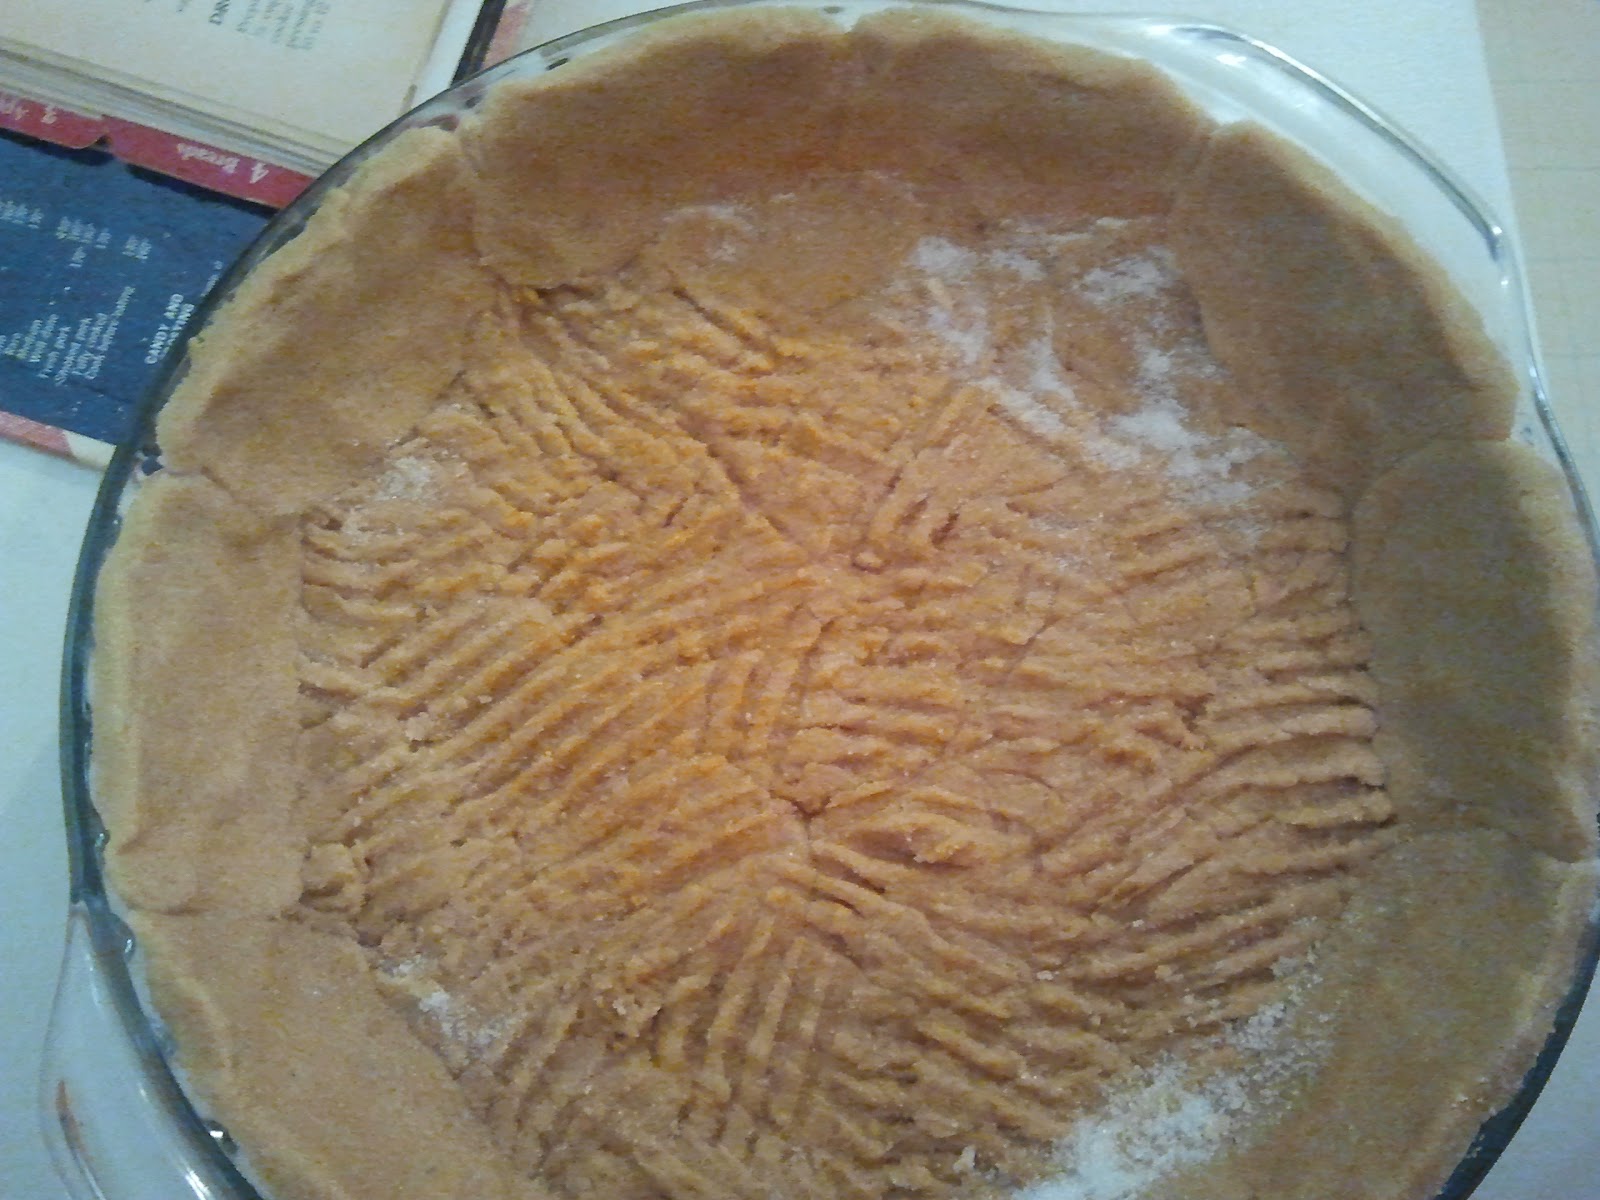
3. Here is where I break from tradition. I thought about baking the cookies, crumbling them, and forming them a la graham cracker crust. Then, I decided to form a crust from the dough. Later I thought about baking the whole batch and then breaking them to fit in the pan. After eating a day-old piece, I know that wouldn't work because the cookie absorbs the moisture and disintegrates when you touch it. So, go ahead and press the dough into a deep-dish pie plate (I used a glass one that was about 9" diameter). I used a small (Tbs) scoop to drop "cookies" into a bowl of sugar, rolled them around, and then used a fork to help press them into the bottom of the pan. I did the same for the side crust, and then mashed the two layers together at the edge of the bottom. I also had dough left over to make 8 cookies (you may want to do this first, to be sure you have them for the top), and baked them alongside the crust at 375 degrees F for 10 minutes.


Cookies can be removed at this point (if doing all cookies, roll in sugar, place 2-inches apart on ungreased cookie sheet, press tines of fork into top in criss-cross pattern, bake at 375 for 10-12 minutes).

4. You may have a problem with the crust not getting done. When I checked it the first time, it was puffed up to the top of the pie plate. I used a fork to deflate it after baking 10 minutes, put it back in the oven and baked it for five more minutes. I continued this process until the crust was evenly browned, and then I deflated it a couple of times as it cooled. Do not worry if it has an almost gummy texture. It will change as it cools.

Fudge Layer: Fantasy Fudge
KRAFT Marshmallow Creme jar
6 cups sugar1 1/2 cups margarine (3 sticks)
1 1/3 cups evaporated milk (we use whole)
2 12-oz pkg semi-sweet chocolate pieces (4 cups)
1 13-oz jar KRAFT Marshmallow Creme
2 cups chopped nuts (omitted)
2 tsp vanilla
*I halved the recipe for this purpose
IMPORTANT: Butter your 13x9-inch glass dish BEFORE you start making the fudge!!!

1. Combine sugar, margarine and milk in heavy 5-quart Dutch oven; bring to full rolling boil, stirring constantly. Continue boiling 5 minutes over medium heat or until candy thermometer reaches 243 degrees F, stirring constantly to prevent scorching.


2. Remove from heat; stir in chocolate pieces until melted. Add remaining ingredients; beat until well blended. *Scoop out 1 cup of fudge and pour/spread over cooled crust before proceeding to #3

3. Pour into two greased 13x9-inch baking pans (one pan if doing half batch). Cool at room temperature; cut into squares. 6 pounds.

Filling: Peanut Butter Pie
from Dorothy Baker, Mountain Recipe Collection by: Valeria S. Ison
1/3 C. peanut butter3 oz. cream cheese (I used 8 oz block)
1 C. powdered sugar
8 oz. Cool Whip
1/2 Tsp. vanilla
1. Mix peanut butter, cream cheese, powdered sugar and vanilla well.
2. Add cool whip 1 spoonful at a time.

3. Put in graham cracker crust and chill 2 hours.
*We use a wire whisk attachment on electric stand-mixer on medium to high for #1, then on stir/low for #2. For this, you pour over fudge as soon as it has solidified in the bottom of the pie crust.


Embellishment
After the pie filling has been spread in the crust, sprinkle chocolate chips on top. Break four of the cookies you baked in half and press them (broken side down in domes) into the filling at regular intervals. This will be 1/2 cookie per slice for an 8 slice pie. If you intend to cut it into more or fewer slices, you can certainly use all 8 cookies for a total possible of 16 slices. My family descended upon the cookies and ate half of them before I could stop them, so I ended up with four for the pie and one to split between my kids.