6/25/2013

So Easy My Four Year Old Made It Cherry Cobbler

"Seize the moment. Remember all those women on the Titanic who waved off the dessert cart." 
- Erma Bombeck

"I don't think a really good pie can be made without a dozen or so children peeking over your shoulder as you stoop to look in at it every little while." 
- John Gould

If you've read any of my other posts, you know I only use one quote, but this one just screamed for 2.  The first reminds us that sometimes we should eat our dessert first - who cares if we spoil our appetites once in a blue moon?  The second was appropriate since this is a pie, and my daughter (who was 4 at the time - she is now a very grown up 5) helped make this and asked eagerly, and frequently, if the pie was ready.  She never calls it cobbler, but when she asks to make a pie I know what she means.  The first one of these I made was with a group of kindergartners I had at an after school daycare.  We simply dotted the butter on top of the cake mix on top of the pie filling, and you can certainly do that.  However, I find that the butter does not melt evenly, or soak into the cake mix evenly, so you end up with dry spots.  Who wants powdery, dry spots of un-buttery cake mix crust on a cobbler?  Not this gal.  So I switched it up, and this is what I made.

So-Easy-My-Four-Year-Old-Made-It Cherry Cobbler


1 Duncan Hines Butter Golden cake mix (or other yellow or white mix)
1 stick butter or margarine, room temperature
1 15oz can Cherry (or other fruit) pie filling (larger if you really like fruit)

1. Spread pie filling in bottom of 9"x13" baking dish.


2.  In a medium mixing bowl, beat butter into dry cake mix using a wire whisk attachment on a handheld or stand mixer.  Mix until it is crumbly and resembles cornmeal.


3.  Sprinkle the cake mix over the pie filling.  Using the tines of a fork like a rake, spread the cake mix out so there are no obvious high spots.  Bake in a preheated 350° oven for at least 35 minutes, but this one took longer.  Check it at 35 minutes, and then add cook time 5 minutes at a time.  You want the crust to be a nice golden brown and a little crunchy around the edges.


 4.  Serve hot with a scoop of ice cream and watch out for cherry pits.

6/24/2013

Hot Fudge S'mores Cake

S’MORES

- Gregory K. -

The campfire burns. It’s 9:08.
I feel so good cuz I just ate
Two graham crackers, and chocolate, too,
With marshmallow turned to warm, white goo.
A treat indeed, a dripping mess. 
A touch of melty joy -- oh yes! 
It’s bedtime soon, but I’m not done. 
I simply cannot stop at one. 
Because, you see, it takes three s’mores 
To make a night of happy s’nores.

No clue who Gregory K. is, but I found that on a discussion board asking for quotes or poems about s'mores.  Personally I am not a fan of campfire s'mores for one reason - the chocolate never melts as good as the marshmallow and I want them both to be ooey-gooey and melty.  I do, however, enjoy the flavor combination of graham cracker, chocolate, and marshmallow.  I had promised my kids they could have homemade chocolate cake or brownies for our family movie night if they didn't ask for chocolates at Maw Ber's house (my mamaw, who is named Bertie - check out the Loaded Brownies I did for her).  They did ask, but only once and then they hushed because they knew I would make good on my promise.  For whatever reason I had been in the mood for s'mores for a few days, so I thought to myself, "How can I incorporate s'mores into a cake?"  I knew that I didn't want to do a graham cracker crust type dessert, and I couldn't put the marshmallows inside the cake because they would disintegrate.  So, this is what I came up with - a variation on the Twix Cake my whole family adores.  I wanted to make my own Microwave Hot Fudge Sauce, and I found a recipe for Marshmallow Ice Cream Topping, but in the interest of saving time (and not knowing just how it was going to work out) I asked my hubby to pick up a couple of jars of Smuckers for me - not as good as homemade, but excellent in a pinch.

Hot Fudge S'mores Cake


Duncan Hines Dark Chocolate Fudge cake mix
1 can sweetened condensed milk
1 jar Smuckers Hot Fudge Ice Cream Topping
1 jar Smuckers Marshmallow Ice Cream Topping
~12 oz miniature marshmallows
1 King Size Hershey's bar (milk chocolate)
4 graham crackers (4 pieces each)

1. Prepare the cake mix according to package directions and bake in a lightly greased foil-lined 9x13" pan.  *To make it easier to get the foil in the pan, flip the pan over and form the foil on the bottom, then just slip it in the baking side and press into the corners.*


2. After cake is done, punch a LOT of holes in it using a round-handled wooden spoon.  Do this while the cake is hot.  Pour the sweetened condensed milk over the cake as soon as you are done mutilating it and use a spatula to spread the SCM out.


3. Let the cake cool about 30 minutes.  Microwave the hot fudge sauce (remove the lid first!) on high for 30 seconds, stir, microwave for 15 more seconds, stir.  Pour over the cake (will be more like glopping than pouring) and spread out.  Pour  marshmallow topping on top of that and spread it out.


4. Cover the top of the cake with miniature marshmallows, followed by chopped up Hershey's bar, followed by chopped up graham crackers.


5. Initially I was broiling this to get a nice brown crust on the marshmallows, but the graham crackers were burning.  So, if you want to broil it on LOW, do it before you add the graham cracker pieces.  Otherwise, put it in a 350° oven for a few minutes until the marshmallow and chocolate pieces start to melt.  After eating my third piece (not in the same day), I realized how much yummier it would have been to add a single layer of marshmallows and chocolate, broil it, add another layer of marshmallows and chocolate, broil it, and then add graham cracker pieces.  Hmmm, may have to be a repeat cake with homemade sauces and that topping technique.


6/21/2013

Chicken Salad

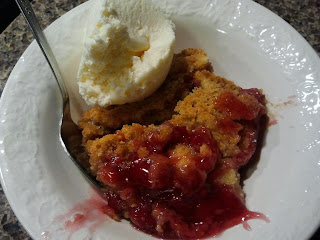
“He that sups upon salad, goes not to bed fasting”
- Thomas Fuller


I realize when this quote was written they probably didn't have such a conglomeration of flavors and ingredients as you find in today's salads, and seeing as it was at least close to 100 years before the documented invention of mayonnaise, this type of chicken salad would have been altogether impossible.  I'm sure you've eaten at restaurants (or out of plastic tubs from the refrigerated section) that have served chicken salad.  What image comes to mind? A mayonnaisey glop of chopped up chicken and a few vegetables thrown in for good measure?  That is not what comes to mind when I think about chicken salad, and after you've tried this recipe I seriously doubt if you'll ever think of chicken salad in quite the same way.  My mom came up with this low-calorie, practically no-fat recipe for chicken salad when I was a kid.  So it is yet another food that I grew up eating.  In recent years we've begun topping our platefuls of chicken salad with Craisins and broken pecan pieces.  I also like to eat it with a thick slice of Colby cheese and Wheat Thin crackers.  Then again you can put it between two slices of wheat bread with a piece of good old American cheese.  Come to think of it, there isn't any way I've eaten it that I don't like!

Demetria's Low-Fat Chicken Salad

4 large boneless skinless chicken breasts 

3 large hard apples (Gala or Fuji)

1 cup red or black seedless grapes

4-5 ribs of celery

1 1/2 - 2 cups Dannon Plain Non-Fat Yogurt

3-4 TB Hellman's Olive Oil Mayonnaise

1.  First things first, cook that chicken!  There are a few ways you can do this:  cube it and saute in a large skillet, saute whole breasts and cube or shred when cooked, simmer in enough water to cover chicken until just done and tender, or throw it in the pressure cooker with some salt and let it do its thang.  If you've never cooked chicken breasts in the pressure cooker, check out our method in the recipe for Chicken & Dumplings.  Now, if you overcook the chicken it will be tough, which makes the finished product a little less palatable.  If you are unsure of your chicken cooking skills, just pick up a baked or rotisseried chicken from your local supermarket.  Note that doing a whole chicken will add fat (dark meat, cooking with skin on) and that picking the meat off the bones takes just as long as sauteing the chicken yourself.  Do not be scared of the chicken breast and its bad reputation for being dry.  Just keep your thermometer handy and when the chicken is browned on both sides, check the internal temperature by inserting the thermometer into the breast from the thick end of the chicken.  *I usually stand it on end with a fork to aid in this task.*


2.  While the chicken cooks, mix up the "dressing" - we only use Dannon Plain Non-Fat Yogurt and Hellman's mayo.  My mom prefers the Olive Oil Mayonnaise with the light green lid, but we always used the lite mayo with the pale blue lid before the Olive Oil kind was introduced.  Just dump the yogurt and mayo into a large mixing bowl and stir until it is thoroughly mixed.


3.  Chicken should still be cooking at this point, so get started chopping!  Wash the apples, celery, and grapes first; dry them thoroughly, and then dice the apples and celery and halve or quarter the grapes depending on how large they are.  

For the apples, we use a corer/slicer that gives us 10 wedges.  The dice needs to be about 1/4" thick and 1/2" square.  Some pieces will not have skin, and you can certainly peel the whole apple if you like.  I personally like the added crunch and color the skin gives.  Add the apples to the dressing and toss to coat as soon as they are diced to keep them from turning brown.  


Grapes are the easy part.  Slice them in half or quarter them and toss them into the dressing with the apples.


The celery needs to be a bit smaller because it is so fibrous and hard to chew.  Cut the leafy end and the root end off each stalk.  Slice it into 4 long, thin strips, line up the strips and then dice it in 1/8" - 1/4" pieces.


4.  After the chicken is done (165ยบ internal temp), remove it to a cutting board and cube it into 1/2" pieces.  Add it to the dressing and toss to coat.  It will take a bit of stirring to get everything mixed up well.  


5.  Sprinkle individual servings with dried cranberries and broken pecans if desired.  Stir to remix before serving because the dressing will separate a bit from the moisture of the fruits as well as because the yogurt is runny.  If you want a thicker texture you can always drain your yogurt by spooning it into cheesecloth and letting the excess moisture drip through into a bowl.

6. This is not a strict recipe, more like a guideline.  If you like more or less of something, feel free to tailor it to your tastes!

6/18/2013

Easy Cinnamon Rolls

"Cinnamon bites and kisses simultaneously."
- Vanna Bonta

I love homemade cinnamon buns, but I don't always have time to spend making The Best Ever Cinnamon Rolls, which truly are the best but take a really really long time to make.  I'm talking overnight.  These take relatively little time when compared to that, and they taste so much better than what you can get in a can - no offense Poppin' Fresh!  You will need to check out the recipe for Blue Ribbon Buttermilk Biscuits, since that is the base for these cinnamon rolls.  After you get the dough mixed and rolled out (I do recommend rolling rather than patting the dough for this), you could top it in any way you want - orange zest, cranberries, and pecans; raisins, cranberries, pecans; apples and walnuts; marshmallows, graham cracker crumbs and chocolate chunks - mmmmm!  I may have to try that - S'mores Rolls.  This is very versatile, it just all depends on what you like.

Easy Cinnamon Rolls


Biscuit dough
1 cup brown sugar, loosely scooped
6-8 Tb butter
1 tsp cinnamon
1/4 cup flour
2/3 to 1 cup: baking raisins, Craisins, or broken pecan pieces (or up to 1 cup of each!)
1 cup powdered sugar
2-4 Tb milk
1 tsp vanilla

A note about "baking" raisins:  I did not know such a thing existed until a couple years ago.  They are packed in a small amount of liquid so they stay soft and a little more plump than their boxed/bagged counterpart.  Either version will work with this recipe.  Regular raisins will plump up when you add heat and a little moisture, so if you don't have "baking" raisins, don't fret, just use whatcha got.

1. Make biscuit dough.  You can't make these without it!


2. Turn dough out onto lightly floured surface.  Gently pat it into a ball.  Roll dough out to large rectangle (18" x 12" roughly).  I prefer to use a silicone pastry mat for a couple of reasons - it keeps my table from having bits of stuck-on dough all over it, and it helps me to be able to roll everything up later on.  I also use a Wilton fondant rolling pin with the 3/16" guides on it - that way the thickness is consistent.


3. Cut butter into chunks and use a pastry blender, two forks, or two knives to "cut" butter into sugar and cinnamon until it is almost paste-like.  Basically you just mash it all up.  It will have large clumps, that is perfect.


4. Evenly sprinkle sugar mixture on dough - I suppose if you were careful you could actually spread it, but sprinkling works just fine - leaving a 1/2" border around the edges.  Top with raisins, Craisins, and broken pecan pieces.  *I wrote out the recipe long ago, and when I made it recently I did NOT use the flour.  Actually I can't even remember now what I used it for, but I suspect it was to keep the dried fruit and nuts from clumping together.  So, if you want, you can toss the dried fruit and nuts (if using) in the 1/4 cup flour before you sprinkle them.  Makes them a bit easier to work with, and it may help to thicken the syrupy sugar and butter.*


5. Starting on the long edge of the dough, roll the dough carefully to the other side.  Make sure you keep the roll tight so it is round instead of flattish.  This is where I use the silicone mat to help me roll.  It is easier to lift the entire edge of dough at once if you have something under it.  If any of your stuffing falls out, just pick it up and poke it back in (or you could eat it).


6. Trim the excess dough from both ends - this more-or-less just makes it look nice and even but is an unnecessary step.  Cut filled, rolled dough into 1 1/2" portions - I don't actually measure this, I just divide my dough in half and each half into 4 pieces so I have 8 servings (check out my knife score-marks).  Place them in a lightly greased deep dish pie plate or casserole dish.  Make sure the sides either touch slightly or are very close together - in other words do NOT space them out in a 9x13 like I did in this photo, I usually use the deep dish pie plate and it works fantastically - otherwise the rolls flatten out and all the stuff runs out and gets stuck all over the dish instead of being inside the yummy-scrummy rolls.


7. Bake in a preheated 450ยบ oven for 10-15 minutes, or until tops are golden brown.


8. In a small bowl, mix powdered sugar, milk, and vanilla to make a thick glaze - 2 Tb will make a considerably thicker glaze than 4 Tb, so start with 2 and adjust until you have the consistency you like.  Spread or spoon glaze on tops of cinnamon rolls.